
The 2010 ADA Standards require a minimum clear width of 32 inches, measured with the door open 90 degrees from the face of the door to the stop, Access-board, rising to 36 inches when the opening depth exceeds 24 inches. Thresholds cap at 1/2 inch in new construction. Hardware must be mounted within a specified height range and operate with one hand, and interior hinged doors can’t exceed 5 pounds of opening force.
TL;DR:
- Measure clear width with the door open 90 degrees from face to stop, accounting for hardware projection, especially when walls are deeper than 24 inches.
- Ensure maneuvering clearance on push and pull sides meets specific floor space requirements, avoiding obstructions within 18 inches of the latch side that project more than 8 inches.
- Keep thresholds at 1/2 inch maximum height in new construction, with bevels over 1/4 inch rise following a 1:2 slope; replacement may be necessary if thresholds can’t be beveled properly.
- Install hardware operable with one hand and within 34 to 48 inches high, ensuring opening force does not exceed 5 pounds for interior hinged doors.
- Automatic doors can bypass some clearance limits but still require a minimum 32-inch clear width, with some jurisdictions now mandating automatic operators for certain entrances.
Table of Contents
- What Counts as ADA Door Clearance?
- How Much Maneuvering Clearance Does a Door Need?
- What Are the ADA Threshold Height Limits?
- Hardware Height and Opening Force: What Gets Checked First
- When Do Recessed Doors Need Extra Clearance?
- Where Do Local Codes Override Federal ADA Rules?
- A Step-by-Step Field Verification Checklist
- Star Windows Solutions: Local Expertise on Door Compliance
- Do Automatic Doors Follow the Same ADA Clearance Rules?
- How Do Double Doors and Paired Doors Affect Clearance?
- Do Revolving and Sliding Doors Have Different Clearance Rules?
- What Floor Surface Requirements Apply Near a Door?
- How Should Accessible Doors Be Marked and Contrasted?
- Where the Real Compromises Happen on Accessible Doors
- How Star Windows Solutions Handles ADA Door Remediation
- Sources
What Counts as ADA Door Clearance?
ADA door clearance covers two separate but related measurements, and mixing them up is the single most common mistake on a punch list. The first is clear width, the actual passable opening a wheelchair or walker has to fit through. The second is maneuvering clearance, the floor space someone needs on either side of the door to approach, grip the hardware, and pull or push it open without backing into a wall.
Both numbers come from the same source: Section 404 of the 2010 ADA Standards, which the Code of Federal Regulations reproduces verbatim in 36 CFR Appendix D to Part 1191. That’s the legal text an inspector will point to if a project gets flagged, and it’s the same language local building departments cross-reference against ICC A117.1 when they write their own accessibility amendments.
Clear width gets measured with the door open 90 degrees, tape running from the face of the door to the doorstop. Not from wall to wall. Not with the door closed. A door leaf that measures 34 inches in the frame can easily drop below 32 inches of clear passage once you account for the thickness of the door and any hardware that projects into the opening, like a lever handle or a panic bar.
- Measure clear width with the door open 90°, not closed
- Account for door thickness and hardware projection into the opening
- Openings deeper than 24 inches (thick walls, vestibules) need 36 inches of clear width, not 32
- Sliding and folding doors follow the same 32/36-inch rule but measure clear width differently, since there’s no swing arc to open through
- Recheck clear width after hardware installation, not just after the door slab goes in
Pro Tip: Measure clear width twice: once right after the door is set, and again after all hardware (kick plates, panic bars, door closers) is installed. A compliant rough opening can fail inspection once hardware eats into the passage space.
The most frequent field error isn’t a design mistake. It’s someone measuring the frame opening instead of the actual clear passage, then discovering during final inspection that a lever handle or an automatic closer arm has shaved half an inch off what looked fine on paper.
How Much Maneuvering Clearance Does a Door Need?
The maneuvering clearance table in Section 404.2.4 sets different floor space requirements depending on which side of the door you’re approaching from and which direction the door swings. These numbers matter as much as clear width, and they’re the ones contractors most often skip because they require open floor space, not just a wider door.
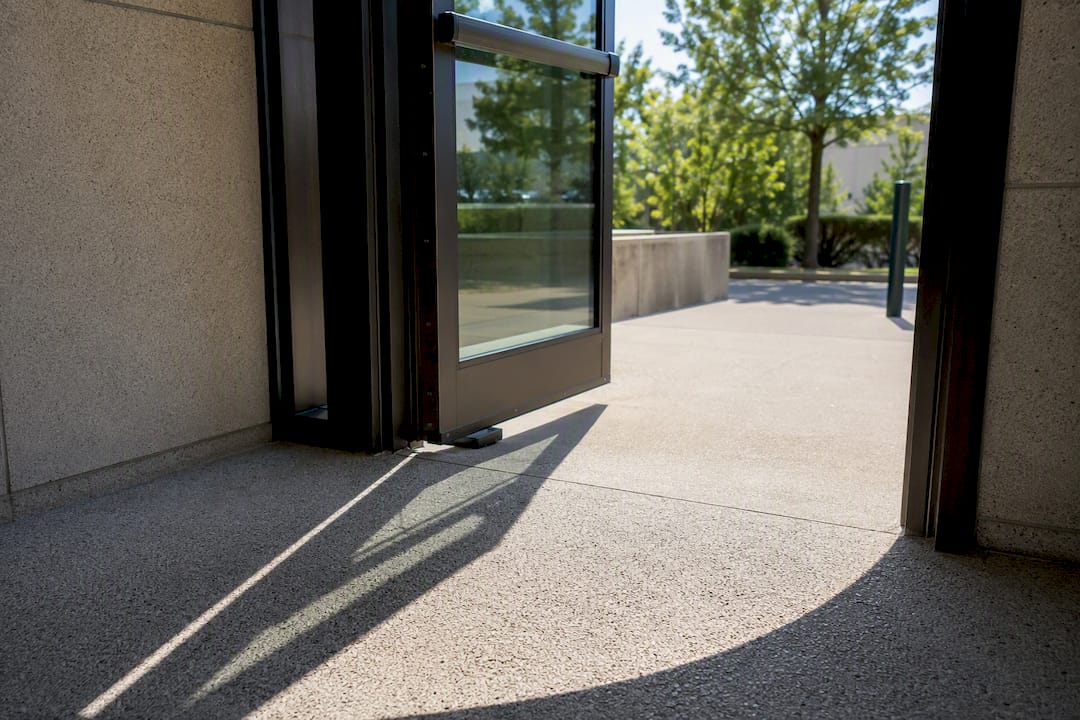
For a front approach, where you’re walking straight at the door, pulling it open on the pull side requires 60 inches of clear floor space perpendicular to the doorway and 18 inches beyond the strike edge. Pushing it open on the push side requires 48 inches perpendicular and technically 0 inches beyond the latch side, but that jumps to 12 inches if the door has both a closer and a latch, since you need room to stand clear of the swinging leaf while it clicks shut.
Hinge-side and latch-side approaches change the numbers again. Certain hinge-side and latch-side approaches require specified maneuvering clearances to accommodate door hardware and motion. These aren’t arbitrary; the Access Board’s guidance treats maneuvering clearance as part of the full path of travel, not an isolated dimension at the door itself, which is why nearby casework or a poorly placed reception desk causes so many failed inspections.
The 18-inch trigger: any obstruction within 18 inches of the latch side that projects more than 8 inches into the maneuvering space forces the design into forward-approach clearances, even if the door itself is code-compliant.
Recessed doors run into this constantly. A door set back in an alcove, flanked by walls that project more than 8 inches within 18 inches of the latch edge, no longer qualifies for the reduced side-approach clearances. The design has to provide full forward-approach space instead.
A few practical reads on common layouts:
- Storefront entries usually have generous approach space out front, but interior vestibule doors right behind them often fail because the second door sits too close to the first
- Interior office doors off narrow corridors frequently violate the latch-side 18-inch rule when a mail slot, shelf, or fire extinguisher cabinet sits too close to the frame
- Patient room doors in healthcare settings get an exception in some cases for the latch-side clearance on the push side, but only where the specific exception in the standards applies, so check the current text rather than assuming
What Are the ADA Threshold Height Limits?
Thresholds trip up more retrofit projects than almost any other single dimension, mostly because contractors default to whatever standard threshold ships with a door unit rather than checking the code first.
New construction caps thresholds at 1/2 inch in height. Existing buildings and alterations get a little more room, up to 3/4 inch, but only if the threshold is beveled on both sides. Any threshold edge over 1/4 inch requires a bevel, and that bevel can’t be steeper than a 1:2 slope, meaning for every inch of rise you need at least two inches of horizontal run.
- New construction: 1/2 inch maximum threshold height
- Existing or altered buildings: up to 3/4 inch, beveled both sides
- Bevel required above 1/4 inch rise
- Maximum bevel slope: 1:2 (one unit vertical to two units horizontal)
The practical decision on a retrofit usually comes down to whether beveling an existing threshold gets you under 3/4 inch, or whether the threshold needs full replacement. A worn wood sill that’s settled unevenly, or a commercial saddle that’s been repainted a dozen times, often can’t be beveled cleanly enough to meet the slope requirement. At that point, replacement is the only path that holds up under inspection, and it’s usually cheaper in the long run than repeated remediation attempts on a threshold that keeps failing the tape measure.
Thresholds also sit inside the accessible route, so a compliant door with a noncompliant threshold still fails the whole route. Check the transition on both sides of the doorway, not just at the door itself.
Hardware Height and Opening Force: What Gets Checked First
Hardware operability is where a lot of otherwise well-designed doors quietly fail. The rule is simple to state and easy to get wrong in practice: hardware must be operable with one hand and avoid requiring tight grasping or twisting of the wrist.
That single sentence eliminates traditional round doorknobs from anywhere on an accessible route. Lever handles, push plates, and panic hardware all qualify; a smooth round knob generally does not, regardless of how easily it turns.
- Hardware must operate with one closed hand, no tight grasp or twist required
- Mounting height: 34 to 48 inches above the finished floor (some states set a narrower band, so verify locally)
- Round doorknobs are typically noncompliant on their own
- Kick plates and push-side hardware need to form a smooth surface up to 10 inches above the floor, so nothing catches a wheelchair footrest or cane tip
Opening force is the other half of the equation, and it’s the one that causes callbacks after installation rather than before. Interior hinged doors max out at 5 pounds of force to open, measured at the latch, excluding the force needed to overcome the door’s latch mechanism itself. Fire-rated doors with heavy-duty closers routinely exceed this, since fire codes push for a firmer close while accessibility rules push the opposite direction.
Pro Tip: A basic fish-scale force gauge, the kind fire marshals use, will tell you in under a minute whether a closer is out of range. If a door consistently reads over 5 pounds, adjusting the closer’s spring tension is usually the first fix, not replacing the whole unit.
For projects where the closer can’t be adjusted enough without compromising fire performance, that’s the point where hardware replacement or a low-energy automatic operator becomes the practical answer rather than an afterthought.
When Do Recessed Doors Need Extra Clearance?
An alcove, a deep jamb, or a wall return near the latch side changes the math even if the door and threshold are both perfectly compliant. Any obstruction sitting within 18 inches of the latch side, and projecting more than 8 inches into the maneuvering space, disqualifies the reduced side-approach clearances and forces a forward-approach layout instead.
Offsets up to 8 inches are still allowed to account for normal wall thickness, jamb depth, or a shallow niche, so not every recess is a problem. The trigger is specifically that 8-inch projection combined with the 18-inch proximity to the latch edge.
- A shelf, mail cubby, or fire extinguisher cabinet near the latch jamb is the most common offender
- Deep masonry openings on older commercial buildings frequently exceed the 8-inch allowance without anyone noticing until inspection
- Remedies include relocating the obstruction, widening the alcove, or reframing the opening to shift the door forward
Where Do Local Codes Override Federal ADA Rules?
The 2010 ADA Standards set the federal floor, not the ceiling. States and municipalities can, and often do, adopt stricter accessibility amendments, and the authority having jurisdiction, the AHJ, gets the final word on which version applies to a given project.
Some jurisdictions narrow the hardware mounting height range below the federal 34 to 48 inch band, and design teams working across state lines need to check the local amendment before locking in hardware specs. California is a frequently cited example of a state with a tighter hardware height requirement than the federal standard.
- Start with the Access Board’s guidance and the CFR appendix D text for the federal baseline
- Cross-check ICC A117.1, since most local codes incorporate it by reference
- Confirm any local amendments directly with the AHJ before plan submission, not after
- Keep a written record of which code edition and local amendment governed the design decision
A practical workflow: pull the federal clear width and maneuvering numbers first, then run every dimension against the local code adoption before submitting for plan review. Document the source for each number, since a plan reviewer will ask which standard a given clearance came from if it looks unusual.
A Step-by-Step Field Verification Checklist
Running the same sequence on every door keeps inspections consistent and gives you a clean paper trail if a project gets questioned later.
- Measure clear opening width with the door held open at 90 degrees, tape from face to stop
- Check threshold height and bevel slope on both sides of the doorway
- Measure maneuvering clearance depth on both the pull and push sides, noting any latch-side or hinge-side offsets
- Confirm hardware mounting height and test one-hand operability
- Test opening force with a gauge and time the closer’s swing speed if one is installed
A tape measure, a small level, and a basic digital force gauge cover almost every field check. Photograph each measurement with the tape visible in frame, and note the door’s location on a floor plan rather than relying on memory later.
Pro Tip: Build a one-page memo for each door: location, clear width, threshold height, maneuvering clearance on both sides, hardware height, and opening force. Plan reviewers move faster on submissions that already show the numbers instead of making them dig through drawings.
Consulting a vendor checklist for window and door services before hiring an installer helps confirm the scope of work actually includes these measurements, not just the door swap itself.
Star Windows Solutions: Local Expertise on Door Compliance
Star Windows Solutions handles door replacement, hardware replacement, threshold remediation, and on-site measurement for compliance projects across the Kansas City area. That combination matters because the four items most likely to fail an ADA inspection, clear width, threshold height, hardware height, and opening force, usually require coordinated fixes rather than a single swap.
A DIY threshold bevel or a hardware swap from a home center often solves one dimension while leaving another out of range. A professional site visit measures all four together and flags which one is driving the noncompliance before ordering materials.
Do Automatic Doors Follow the Same ADA Clearance Rules?
Power-assisted and automatic doors still have to meet the same 32-inch clear width minimum as manual doors, but they get relief on two of the toughest requirements: opening force and maneuvering clearance.
Because an automatic operator does the work of pushing or pulling the door, the 5-pound force limit that governs manual hinged doors doesn’t apply the same way. The maneuvering clearance in front of an automatic door can also be reduced compared to a manual swinging door, since the person approaching doesn’t need room to stand clear while gripping a handle.
That tradeoff makes automatic operators a genuinely useful fix where a building’s floor plan can’t physically accommodate full maneuvering clearance. A narrow vestibule that can never hit 60 by 18 inches on the pull side might still pass with a low-energy automatic operator installed, since the clearance math changes once the door opens itself.
Some code cycles push this further. Recent IBC updates have started requiring automatic operators at certain public entrances outright, not just as a workaround for tight floor plans. That’s a shift worth checking against the current locally adopted building code, since it can turn an optional upgrade into a mandatory one depending on occupancy type and entrance function.
Clear width still gets measured the same way, door open, tape to the stop, whether the door swings on a hinge or slides open on a sensor.
How Do Double Doors and Paired Doors Affect Clearance?
Paired doors, the kind with two leaves meeting in the middle, create a wrinkle that single-leaf calculations don’t address: which leaf actually has to meet the 32-inch clear width requirement.
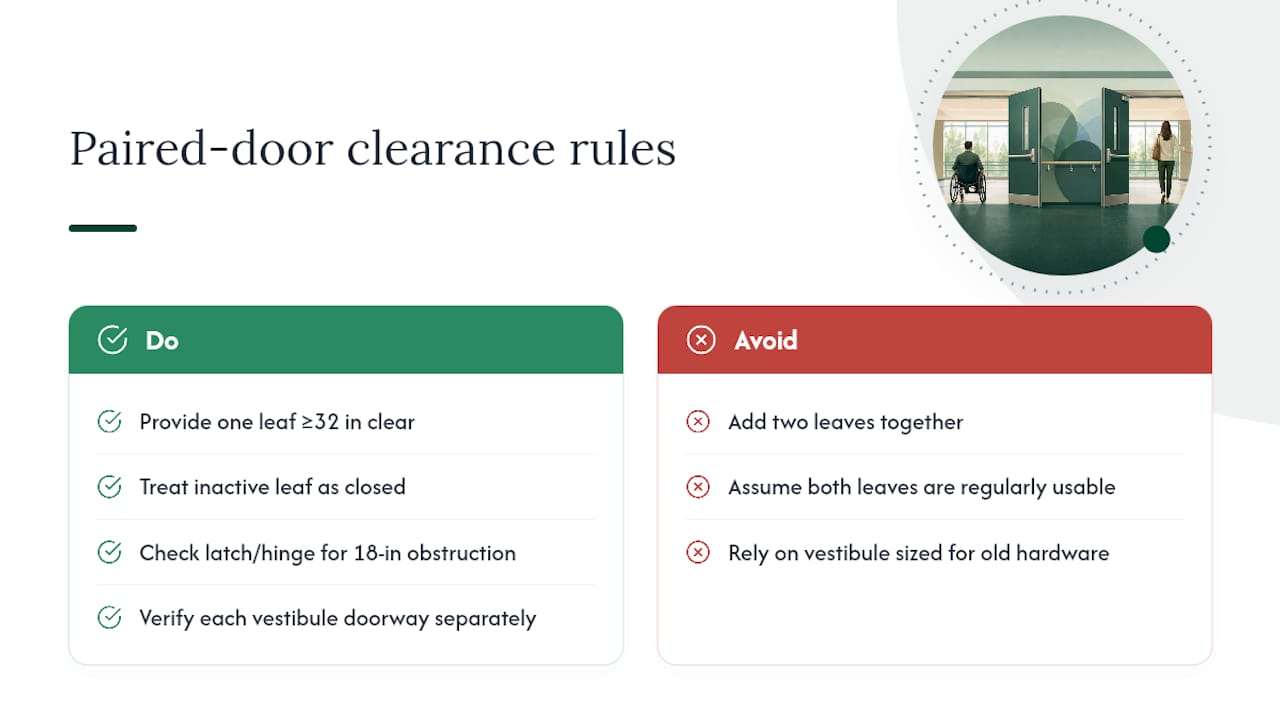
When one leaf of a pair is inactive, typically held shut with a bolt and only opened occasionally, the active leaf alone has to provide the full 32 inches of clear width. You can’t add both leaves together and call the pair compliant if neither individual leaf hits the minimum on its own.
If both leaves of the pair are intended for regular use, at least one of them still has to independently meet the 32-inch clear width standard. Maneuvering clearance calculations for paired doors follow the same approach-based table as single doors, but the presence of a second leaf on the latch or hinge side can itself become the projecting obstruction that triggers the 18-inch rule discussed earlier.
Vestibules with two sets of paired doors, common in office lobbies and retail entries, are where this gets complicated fast. Each doorway needs its own maneuvering clearance check, and the space between the two sets often isn’t large enough to satisfy both approaches simultaneously, especially in older buildings where the vestibule was sized for the door hardware in style decades ago, not for wheelchair clearance math.
Do Revolving and Sliding Doors Have Different Clearance Rules?
Revolving doors don’t meet ADA accessibility requirements on their own, full stop. Any entrance built around a revolving door has to provide an accessible alternative, a standard swinging or sliding door, within reasonable proximity and along an accessible route.
Sliding doors follow the same 32-inch clear width and 36-inch deep-opening rules as swinging doors, but the measurement method differs since there’s no 90-degree swing arc to reference. Clear width on a sliding door gets measured as the actual clear passage when the door is fully open, edge of the moving panel to the door jamb or stop.
Folding doors, the accordion-style units sometimes used in wider commercial openings, measure similarly: clear width is whatever gap actually exists once the panels have folded completely open, not the nominal width of the opening when closed.
Maneuvering clearance for sliding and folding doors is typically less demanding than for hinged doors, since there’s no swinging leaf to stand clear of and often no closer to work against. That makes sliding doors an appealing retrofit option in tight vestibules where a swinging door’s maneuvering clearance simply can’t be achieved without moving walls.
What Floor Surface Requirements Apply Near a Door?
The clear floor space on both sides of an accessible door has to be a firm, stable, and slip-resistant surface, and it has to be level, with a maximum slope of 1:48 in any direction. That’s a gentler slope than most people assume qualifies as “flat.”
This surface requirement extends beyond just the door threshold itself. The entire maneuvering clearance zone, that 60 by 18 inch or 48 by 12 inch footprint discussed earlier, has to meet the same firm and level standard. A gravel walkway, a loose paver patio, or a worn carpet transition with a lip higher than 1/4 inch can all fail this requirement even when the door and hardware are perfect.
Changes in level within the clear floor space follow the same rules as thresholds: anything under 1/4 inch needs no treatment, 1/4 to 1/2 inch needs a bevel at 1:2 slope or shallower, and anything taller needs a ramp or a different solution entirely. This is where exterior commercial entrances often run into trouble, since a settled sidewalk slab or an uneven concrete pour outside the door can undo compliance that’s otherwise perfect on the door itself.
Check the approach surface during the same site visit as the door measurements, not as a separate step. A door that measures perfectly on paper can still fail an inspection if the concrete leading up to it has settled unevenly since it was poured.
How Should Accessible Doors Be Marked and Contrasted?
ADA door clearance rules don’t set specific paint colors or signage fonts, but visual contrast and wayfinding signage play a real role in making an accessible entrance actually usable, and several related standards address it directly.
Door hardware and the door itself should contrast visually with the surrounding wall or frame, making the opening easy to locate for people with low vision. A dark bronze lever on a dark bronze door blends into a dark frame, which technically meets every dimensional requirement while still being hard to find.
Signage identifying accessible entrances, when provided, should follow the tactile and visual character requirements in Section 703 of the ADA Standards, including raised characters and Braille where the sign identifies a permanent room or space. For entrance doors specifically, directional signage pointing toward the nearest accessible entrance matters most where the main entrance itself isn’t accessible, a common situation in older buildings with a stepped front entry and an accessible side or rear door.
Consistent contrast and signage don’t fix a door that fails the 32-inch clear width test, but they solve the parallel problem of a compliant door nobody can find.
Where the Real Compromises Happen on Accessible Doors
Fire-rated doors and accessibility rules pull in opposite directions more often than people expect. A closer strong enough to satisfy a fire marshal routinely exceeds the 5-pound opening force limit, and adjusting the spring tension too far can compromise the self-closing function that makes the door fire-rated in the first place.
The sensible middle ground, in most retrofit cases, is a low-energy automatic operator rather than fighting the closer spring down to an unsafe setting. It’s not always the cheapest fix, but it resolves the force problem without touching the fire rating.
One recurring pattern: a narrow vestibule where full maneuvering clearance is structurally impossible without moving a load-bearing wall. In those cases, an automatic operator on one leaf of a paired door often solves what framing changes can’t.
— Artem
How Star Windows Solutions Handles ADA Door Remediation
Bringing a door into compliance rarely comes down to one fix. A threshold that needs beveling, hardware that’s mounted too high, and a closer set too tight often show up on the same door, and addressing them piecemeal wastes both time and budget.
Star Windows Solutions is the practical alternative to hiring separate specialists for each piece of an ADA door retrofit in the Kansas City area: one site visit covers door replacement, hardware replacement, and threshold correction in a single measured plan. A free estimate includes on-site measurement of clear width, threshold height, hardware position, and opening force, plus a written recommendation for what needs to change and what’s already compliant. Financing options are available for larger commercial door and storefront projects. If your building has doors that might not clear the 32-inch or maneuvering clearance requirements covered above, request a free estimate on commercial window and door replacement and get a specific remediation plan instead of a guess.
For readers weighing broader accessibility renovations beyond door openings, Statera Contracting’s guide on safety-first remodeling for seniors covers related considerations worth reviewing alongside door compliance.
Sources
For the exact code language behind every figure in this guide, consult the Access Board’s Chapter 4 guidance for clear width, maneuvering clearances, and hardware; 36 CFR Appendix D for the legal text; and UpCodes’ clear width summary for the 36-inch deep-opening exception. Cross-check ICC A117.1 and your local AHJ for any stricter amendments.
- Guide to the ADA Accessibility Standards — Chapter 4: Entrances, Doors, and Gates
- 36 CFR Appendix D to Part 1191 — 404 Doors, Doorways, and Gates
- Allegion — Accessibility solutions