
Stop the sun before it hits the glass. That’s the single most effective principle for cutting solar heat gain through windows, and every other fix ranks below it. Here’s the fast version:
- Exterior shading (awnings, roll-down solar screens, shutters): blocks 65–77% of solar heat gain before it ever touches the glass — the highest-impact class of solutions
- Window films and low-E coatings: reduce solar heat gain by up to 78% at the glass surface, with minimal view impact — best for renters and mid-budget homeowners
- Interior treatments (cellular shades, blackout curtains): reduce heat transfer noticeably but work best layered with films or sealing
- Weatherstripping and caulk: cheap, fast, and fixes the air-leakage portion of heat gain that shading alone won’t touch
- Professional window replacement: the durable fix when glass is single-pane, seals have failed, or frames are warped
Renters: start with window film and cellular shades — both are removable and require no tools. Homeowners: exterior shading plus sealing delivers the fastest payback, with replacement as the long-term answer when the glass itself is failing.
The U.S. Department of Energy and ASHRAE both use Solar Heat Gain Coefficient (SHGC) as the key metric for window thermal performance. The lower the SHGC, the less solar heat enters the room.
Key Takeaways
| Point | Details |
|---|---|
| Exterior shading first | Awnings and solar screens block 65–77% of solar heat gain — more than any interior fix. |
| Films for renters and mid-budget owners | Solar-control films cut heat gain by up to 78% and are removable without frame damage. |
| Seal before you shade | Caulk and weatherstripping fix air leakage that shading alone won’t address; cost under $50. |
| Interior treatments as a second layer | Cellular shades and blackout curtains reduce heat transfer but work best combined with film or sealing. |
| Star-ws for replacement | When seals fail or glass is single-pane, Star Windows Solutions offers free estimates on Low-E replacement in the Kansas City area. |
Table of Contents
- Why does heat come through windows so easily?
- Exterior shading: the most effective way to reduce heat from windows
- How window films and low-E coatings cut solar heat gain
- Interior window treatments that actually reduce heat
- Weatherproofing and sealing: fixing the leaks that shading misses
- DIY and emergency fixes: fast relief with real trade-offs
- How to choose the right fix for your situation
- When should you replace windows instead of treating them?
- What most homeowners get wrong about blocking window heat
- Star-ws can solve your window heat problem for good
- Sources
Why does heat come through windows so easily?
Solar radiation is the dominant source of summer heat through windows, not conduction through the glass. That distinction matters because it changes which fixes actually work.
When sunlight hits a window, three things happen. Some light passes straight through and warms surfaces inside. Some is absorbed by the glass and re-radiated inward. A smaller portion conducts through the frame and glazing due to the temperature difference between inside and outside air. The result is what building scientists call the greenhouse effect at the glass: energy enters easily, but can’t leave as quickly.
ASHRAE’s fenestration chapter formalizes this as three heat-flow terms: conduction (U-factor × area × temperature difference), solar gain (SHGC × solar irradiance × area), and air leakage. On a sunny summer afternoon, solar gain typically dominates the other two by a wide margin for unshaded windows.
SHGC (Solar Heat Gain Coefficient) is simply the fraction of incident solar radiation that becomes heat inside the space. A single clear pane has an SHGC of roughly 0.86 — meaning 86% of the sun’s energy hitting it ends up as indoor heat. Double-pane Low-E glass drops that to about 0.40. Triple-pane Low-E gets down to roughly 0.28.
The three heat paths, ranked by summer impact on a sunlit window:
- Solar/radiant gain: typically 60–80% of total heat transfer on a sunny day — the target for shading and films
- Conduction through glazing: meaningful on hot days, especially single-pane; addressed by upgrading to insulated glass
- Air leakage around frames: often underestimated; a drafty sash seal can add significant load even on a well-glazed window
Orientation matters too. West-facing windows take the worst afternoon sun at a low angle, making them the hardest to shade with a fixed overhang. South-facing windows get high-angle midday sun that a properly sized overhang handles well. East windows are a morning problem; north windows rarely need solar shading at all.
Exterior shading: the most effective way to reduce heat from windows
The reason exterior shading outperforms every interior fix is simple: it stops solar radiation before it converts to heat inside the glass assembly. Once sunlight passes through the glazing, you’re managing heat that’s already in the room.
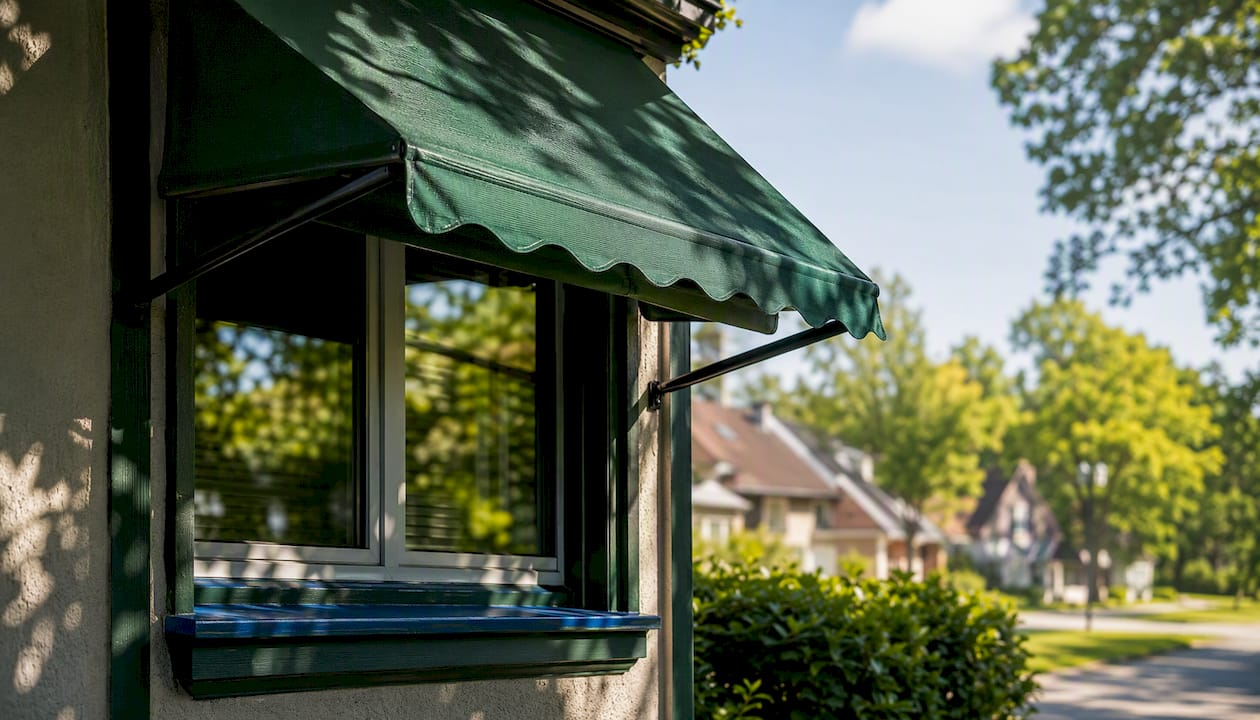
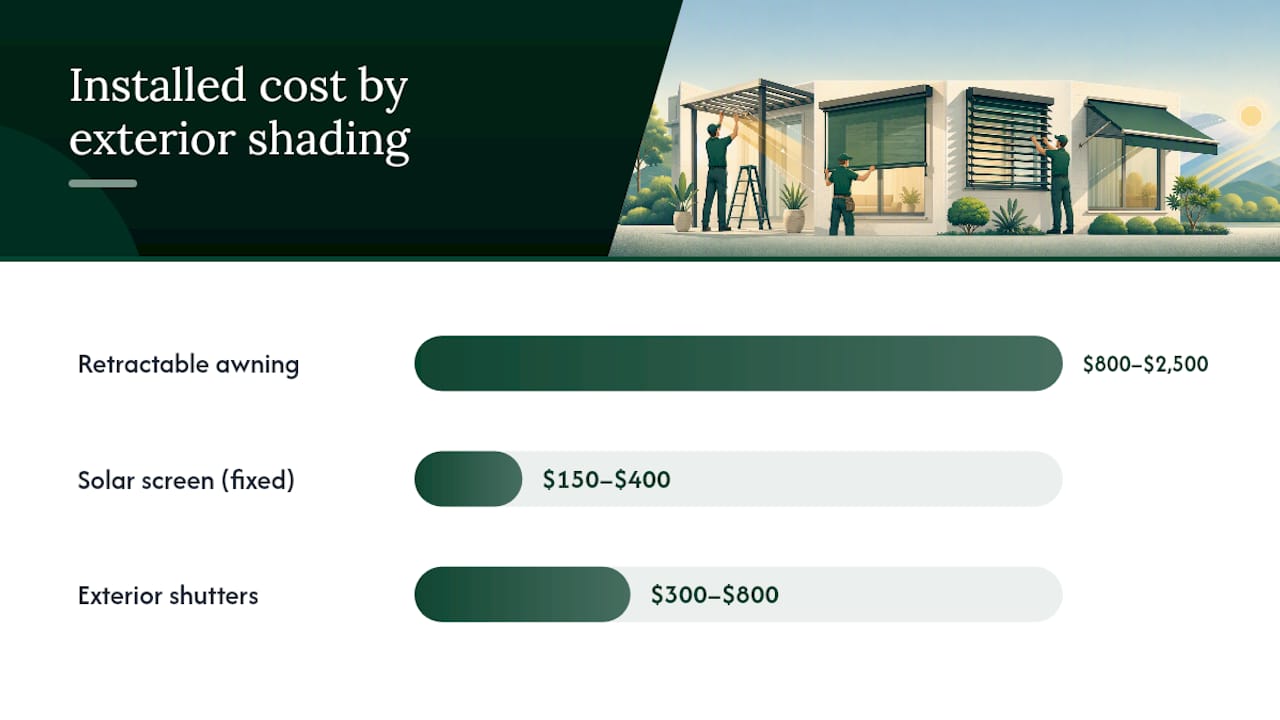
Awnings work best on south and west exposures. Fixed awnings shade midday sun well on south windows, but west-facing afternoon sun arrives at a low angle — a retractable awning you can angle is more effective there. Installed cost for a quality retractable awning typically runs $800–$2,500 per window depending on size and motorization, with a lifespan of 10–15 years.
Exterior solar screens (roll-down or fixed panel) are the go-to for west exposures and renters who want high performance without permanent installation. Fixed panel screens in an aluminum frame cost roughly $150–$400 per window installed; roll-down motorized versions run $500–$1,500. Some clip-on versions require no drilling, making them renter-friendly.
Exterior shutters provide full solar block plus privacy and storm protection. They’re the most effective option when you want complete darkness, but they also block all daylight. Installed cost: $300–$800 per window for standard louvered shutters.
Vegetation and trees are the cheapest long-term solution — a mature deciduous tree on the west or southwest side of a house can shade an entire wall. The trade-off is time: a tree takes years to reach effective size, and placement requires planning so roots don’t threaten the foundation.
For west-facing windows, a fixed overhang barely helps — the afternoon sun is too low. Use a retractable awning or a roll-down screen instead.
| Method | Typical heat blocked | Approx. installed cost | Permanence | Renter-friendly? |
|---|---|---|---|---|
| Retractable awning | 65–77% | $800–$2,500 | Semi-permanent | No |
| Exterior solar screen (fixed) | 60–80% | $150–$400 | Permanent | Clip-on versions: yes |
| Exterior shutters | 65–77% | $300–$800 | Permanent | No |
| Deciduous tree/vegetation | High (long-term) | Low (plant cost) | Permanent | No |
How window films and low-E coatings cut solar heat gain
Modern solar-control films and low-E retrofit coatings reduce SHGC significantly while keeping most of the view intact. The best solar-control films can cut heat gain by up to 78%, which puts them close to exterior shading in raw performance — at a fraction of the installation complexity.
Three main product types:
- Reflective films: mirror-like metallic layer that bounces solar radiation back out. High heat rejection, but noticeably dark from inside and outside. Best for west-facing rooms where glare and heat are severe.
- Spectrally selective (low-E retrofit) films: filter near-infrared radiation while transmitting visible light. You keep a clear view; the heat rejection is slightly lower than reflective films but the visual impact is minimal. These are the best all-around choice for living spaces.
- Tinted films: absorb solar energy rather than reflecting it. Cheaper, but the absorbed heat re-radiates inward — less effective than reflective or spectrally selective options.
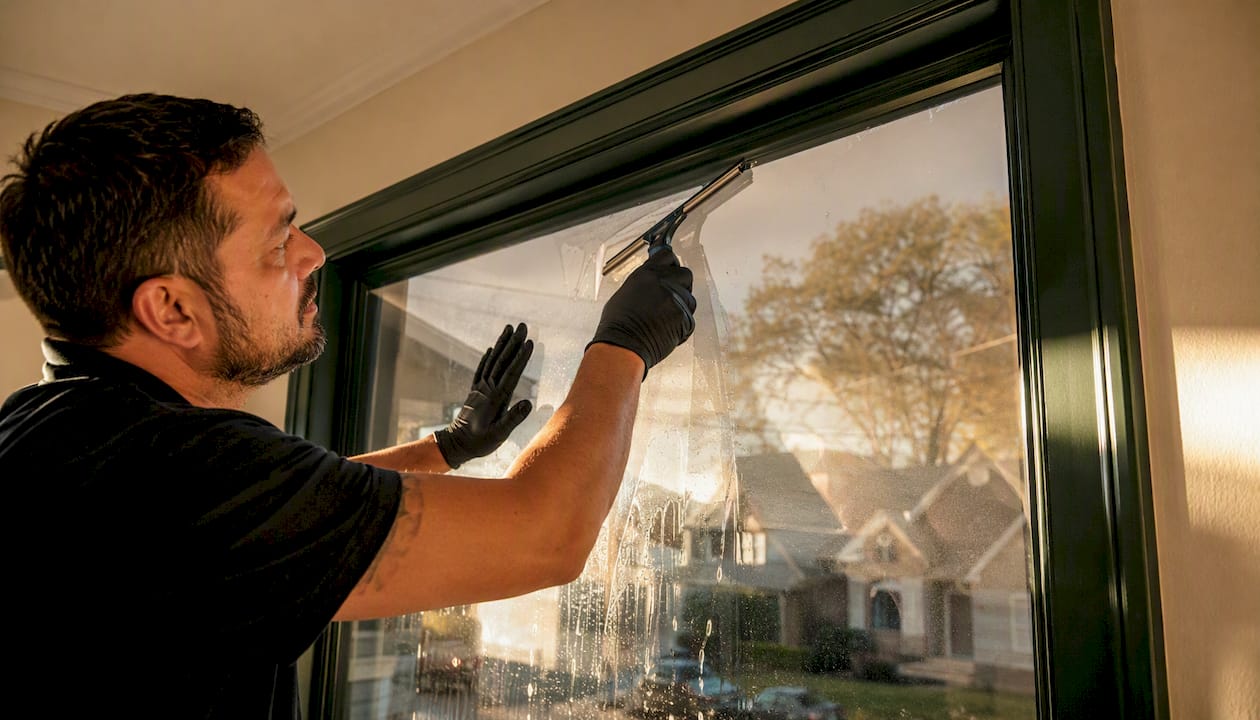
DIY film kits run $30–$80 for a standard window and last 5–10 years before peeling or hazing. Professional installation costs $5–$15 per square foot and typically comes with a 10–15 year warranty. The professional version also handles large or curved glass that DIY kits struggle with.
Films work well for renters (most are removable with a razor and soapy water) and for homeowners who want a midrange upgrade without replacing the glass. They’re less appropriate when the existing glass is already fogged, cracked, or single-pane with failed seals — film on a failing window is money wasted.
Pro Tip: Apply film on a cloudy day or in the shade. Direct sun during installation causes the adhesive to cure unevenly, leaving bubbles that won’t flatten. Use a squeegee from center to edges, and leave a 1/8-inch gap at the frame to allow for thermal expansion.
| Film type | Typical SHGC reduction | Visible light impact | DIY cost (per window) | Pro install cost (per sq ft) |
|---|---|---|---|---|
| Reflective metallic | High (up to 78%) | Noticeable darkening | $30–$60 | $8–$15 |
| Spectrally selective (low-E) | Moderate-high | Minimal | $50–$80 | $10–$15 |
| Tinted absorbing | Moderate | Moderate darkening | $20–$50 | $5–$10 |
Interior window treatments that actually reduce heat
Interior treatments are the most accessible option for renters and budget-conscious homeowners, but set realistic expectations: they work best as a second layer, not a standalone fix. Cellular shades and reflective thermal curtains reduce conductive and radiant heat transfer by trapping a dead-air pocket between the treatment and the glass.
The highest-performing interior options:
- Cellular (honeycomb) shades: the honeycomb pockets add measurable R-value and reduce both conduction and convection at the glass surface. Double-cell versions outperform single-cell. Cost: $60–$200 per window.
- Insulated blackout curtains: reflective backing bounces some solar radiation back out while the fabric insulates. Floor-length panels with a close-fit mount perform significantly better than short panels hung away from the wall.
- Reflective roller blinds: aluminum-coated surface reflects solar radiation; effective when fully closed but offer no insulation when open.
Mounting matters more than most people realize. A cellular shade mounted inside the frame with a tight fit at the top and sides traps air effectively. The same shade mounted loosely on the wall with gaps at the edges loses most of its insulating benefit — warm air convects around the edges and negates the dead-air pocket.
Pro Tip: For maximum performance with curtains, mount the rod as close to the ceiling as possible and let the fabric touch or overlap the floor. Seal the sides against the wall with magnetic tape or Velcro strips. This creates an enclosed air pocket that behaves like a second pane.
For renters, tension rods and removable adhesive hooks make cellular shades and blackout curtains fully portable. No drilling, no damage to the frame.
Installation order for best results:
- Mount the treatment as close to the glass as possible (inside-mount preferred for shades).
- Seal side gaps with magnetic tape or a snug bracket.
- Use floor-length panels for curtains; overlap the wall by at least 4 inches on each side.
- Close treatments during peak sun hours (typically 10 AM–4 PM for south/west windows).
Weatherproofing and sealing: fixing the leaks that shading misses
Sealing and secondary glazing address the conductive and air-leakage portions of window heat gain — the parts that exterior shading and film don’t touch. The fixes are cheap, the materials are available at any hardware store, and a single afternoon of work can make a noticeable difference.
Start with a visual and tactile inspection:
- Run your hand around the sash perimeter on a hot day. Warm air flowing inward means a failed sash seal or weatherstripping.
- Look for fogged or hazy glass between panes. That’s a failed insulating seal — the argon or air fill has escaped, and the unit is now conducting heat like a single pane.
- Check caulk lines at the frame-to-wall joint. Cracked or missing caulk is a direct air and heat path.
- Look for warped frames or sashes that don’t close flush. No amount of weatherstripping fixes a frame that’s out of square.
Common fixes and what to expect:
- Caulk (exterior and interior): $5–$15 per tube, covers 3–5 windows. Lifespan 5–10 years. DIY time: 20–30 minutes per window. Reduces air leakage meaningfully.
- Weatherstripping (foam, V-strip, or door sweep style): $10–$30 per window. Lifespan 3–7 years depending on type. Addresses sash-to-frame gaps.
- Storm windows (interior or exterior): add a second glazing layer that cuts both conduction and air leakage. Interior storm panels cost $50–$150 per window DIY; exterior storm windows run $150–$400 installed. Effective for window insulation in both summer and winter.
- Secondary glazing film (shrink-wrap kits): $10–$20 per window, applied with a hair dryer. Temporary but surprisingly effective for a single season.
Pro Tip: Before caulking, clean the joint with rubbing alcohol and let it dry completely. Caulk applied over dust or old silicone fails within a season. Use a paintable latex caulk for interior joints and a silicone or polyurethane product for exterior exposure.
When fogging appears between panes, or when frames show wood rot or significant warping, call a professional. Those are signs that sealing alone won’t hold — the unit needs replacement. The siding-to-window interface is another area worth inspecting, since gaps there can undermine even a freshly caulked frame.
DIY and emergency fixes: fast relief with real trade-offs
When you need to block heat today and have no budget, a few materials work surprisingly well. The honest caveat: most of them look terrible and block daylight. Use them for emergency relief, a single hot week, or windows that face a wall and nobody sees.
- Aluminum foil (shiny side out): reflects nearly all solar radiation. Effective immediately. Looks like a conspiracy theorist lives there. Best for garage windows, utility rooms, or a single brutal west-facing bedroom during a heat wave.
- Reflectix or bubble wrap: bubble wrap pressed against the glass (bubble side toward the glass) traps an air layer and diffuses light. Less reflective than foil, more tolerable aesthetically. Adheres with a light mist of water — no tape needed, no frame damage.
- Reflective emergency blankets: the mylar material reflects solar radiation well. Tape or clip to the inside of the frame. Remove easily without residue.
- Temporary cling film: available at hardware stores, applies without adhesive, and peels off cleanly. Lower heat rejection than metallic options but preserves some view.
- Cardboard: blocks all light and all heat. Zero aesthetics. Fine for a storage room or a short-term fix while waiting for a film order to arrive.
Pro Tip: When using foil or Reflectix, always orient the reflective surface toward the incoming sun (outward-facing). A foil layer facing inward reflects heat back into the room — the opposite of what you want.
Pro Tip: Keep ventilation in mind. Blocking windows completely traps heat that builds up in the room from other sources. Crack a window on the shaded side of the house to allow cross-ventilation, especially at night when outdoor temperatures drop.
A quick pros/cons summary:
- Foil: maximum heat rejection, zero aesthetics, potential fire risk near open flame — keep away from candles and heat sources
- Bubble wrap: moderate heat reduction, diffused light, renter-safe removal
- Cling film: low-moderate heat reduction, partial view preserved, easy removal
- Cardboard: complete block, free, ugly, and a ventilation risk if overused
How to choose the right fix for your situation
The right sequence is: quick relief first, seasonal upgrade second, replacement when the glass or frame is failing. Here’s how to work through the decision.
Start with these diagnostic questions:
- Which direction does the window face? West and south exposures need the most attention.
- Is the glass single-pane, or do you see fogging between panes? Either condition means film and shading are temporary workarounds, not solutions.
- Are you a renter or an owner? Renters: film, cellular shades, and removable exterior screens. Owners: all options are on the table.
- How long are you staying? Less than two years: film and shades. Five or more years: exterior shading plus replacement if glass is failing.
- What’s your budget? Under $100: sealing and interior treatments. $100–$500: film plus cellular shades. $500+: exterior shading or storm windows.
Action order:
- Seal gaps with caulk and weatherstripping (one afternoon, under $50).
- Add cellular shades or blackout curtains for immediate interior relief.
- Apply solar-control film or install an exterior solar screen for the highest-heat windows.
- Plan replacement if you see fogged glass, single-pane units, or warped frames.
Cost and effectiveness by approach:
| Approach | Typical cost | Approx. heat reduction | DIY or pro? | Best for |
|---|---|---|---|---|
| Caulk + weatherstripping | $20–$50 | Moderate (air leakage) | DIY | All windows, first step |
| Interior cellular shades | $60–$200/window | Moderate | DIY | Renters, budget owners |
| Solar-control window film | $30–$80 DIY / $5–$15/sq ft pro | Up to 78% | Both | Renters, mid-budget owners |
| Exterior solar screen | $150–$400/window | 60–80% | Pro recommended | West/south exposures |
| Retractable awning | $800–$2,500/window | 65–77% | Pro | South/west, long-term owners |
| Full window replacement | $150–$400 per window | Highest (SHGC 0.28–0.40) | Pro | Failed seals, single-pane, rot |
One important note on SHGC: a simulation study across multiple U.S. cities found that in colder ASHRAE climate zones, specifying very low SHGC glazing can actually increase annual energy use because it blocks winter passive solar gains. If you’re in a mixed or cold climate, don’t chase the lowest SHGC number available — ask your contractor for a climate-appropriate spec.
Red flags that point to replacement rather than repair:
- Fogged or hazy glass between panes (failed seal)
- Single-pane glass anywhere in a living space
- Frames that are visibly warped, rotten, or won’t close flush
- Rooms that overheat on a predictable schedule despite shading and film
- AC running continuously on days when it shouldn’t need to
When asking a contractor for a quote, request the SHGC and U-factor specs for the replacement glass, ask about warranty coverage on both the unit and the installation, and get a written timeline. Standardized replacement options often shorten lead times and reduce cost compared to fully custom units.
When should you replace windows instead of treating them?
Replace when the glass itself is the problem. Shading and film are surface interventions — they can’t fix a failed insulating seal, a cracked pane, or a frame so warped it leaks air around the edges regardless of weatherstripping.
The clearest warning signs are: rooms that overheat on a predictable schedule (west-facing afternoons being the classic pattern), interior glass that feels hot to the touch compared with a Low-E pane nearby, continuous AC runtime on days that shouldn’t require it, and visible fogging or moisture between panes. Any one of these signals that the glazing unit has lost its thermal performance.
What professional replacement delivers:
- Lower SHGC and U-factor: double Low-E glass at SHGC ≈ 0.40 cuts solar gain by more than half compared to single clear glass (SHGC ≈ 0.86); triple Low-E at SHGC ≈ 0.28 cuts it by two-thirds
- Argon or krypton gas fill: reduces conduction between panes beyond what air-filled units achieve
- Durable factory seals: a properly installed insulating glass unit holds its gas fill and thermal performance for 20+ years
- Warranty coverage: both the unit and the installation, so a failed seal gets replaced at no cost
Star-ws handles fogged-glass replacement on projects ranging from single residential panes to large multi-panel window walls, with free estimates and financing options for Kansas City-area homeowners and commercial property managers. The scope of a professional inspection typically covers glass condition, frame integrity, sill and flashing, and weatherstripping — not just the pane itself.
Pro Tip: Ask your contractor to specify the SHGC and U-factor for the replacement unit in writing before signing. A vague “energy-efficient glass” claim means nothing. The number tells you exactly what performance you’re buying.
For commercial window replacement or larger residential projects, the same principles apply — lower SHGC on west and south exposures, climate-appropriate spec for north and east, and a contractor who can show you the product data sheet.
What most homeowners get wrong about blocking window heat
The most common mistake is treating interior curtains as the primary fix for a west-facing window and wondering why the room still bakes at 4 PM. Curtains help, but they’re working with heat that’s already inside the glass assembly. By the time solar radiation has passed through the glazing and warmed the air pocket between the curtain and the window, the room is already gaining heat. The curtain slows the spread into the living space; it doesn’t stop the gain at the source.
The second mistake is applying film or buying new shades without first checking whether the seals have failed. A fogged window with a $60 cellular shade in front of it is still a fogged window. The shade reduces conduction slightly; the failed seal keeps dumping heat. Fix the glass first, then layer the treatments.
There’s also a tendency to over-specify low SHGC in every direction. North-facing windows in a cold climate gain almost no summer solar heat — and a very low SHGC there means you’re also blocking free winter warmth. Match the spec to the orientation and the climate, not just the season you’re trying to fix.
The practical order that actually works: seal the leaks, shade the glass from outside, film what you can’t shade, and replace what’s failing. That sequence costs less in total than buying treatments for a window that needs replacement, then replacing it anyway two years later.
Star-ws can solve your window heat problem for good
If sealing and shading have done what they can and the glass is still the problem, Star Windows Solutions offers free estimates on window glass replacement for Kansas City-area homeowners and commercial properties. The service covers fogged-glass replacement, full unit replacement with Low-E and argon-fill options, weatherstripping installation, and window frame rot repair — everything from a single failed pane to a full-building upgrade.

Financing is available, and estimates are free with no obligation. Star-ws works with homeowners, property managers, and contractors across the Kansas City region. To get a quote or schedule an inspection, visit Star-ws or call directly — the estimate includes a full assessment of glass condition, frame integrity, and the right performance spec for your orientation and climate.
Sources
- How to Block Heat From Windows in Summer: Every Method Ranked by Effectiveness
- CHAPTER 15. FENESTRATION
- Study of optimal SHGC in mixed climates (simulation study)
- Is Summer Heat Sneaking Through Your Windows? 5 Warning Signs – Kennewick Windows & Doors | Perfection Glass | Walla Walla, WA