
Most exterior door sweeps can be replaced by a homeowner, and door sweep replacement is one of the cheapest energy fixes you can do in an afternoon. Face-mounted and slide-in insert sweeps usually take 15 to 60 minutes and cost $10 to $60 in materials. Wraparound styles, rotted door bottoms, or a mismatched kerf profile are where this turns into a professional job, sometimes requiring the door to come off its hinges entirely.
TL;DR:
- Choosing the correct mounting style and measuring the largest gap is crucial to ensure a proper seal and avoid having to redo the job later.
- Most face-mounted and insert sweeps can be replaced with the door still hanging, making DIY installation straightforward and quick.
- Inspect the door bottom and threshold for rot or damage before installing a new sweep, as a compromised door will not seal properly.
- Brush sweeps work better on uneven floors, while vinyl or rubber blades seal tighter on level thresholds and resist pests more effectively.
- Hire a professional if there is persistent water intrusion, rot, or if the sweep profile is manufacturer-specific and hard to source.
Table of Contents
- Types of Door Sweeps and When to Use Each
- How to Choose a Replacement: Mounting Style, Gap Height, and Door Material
- Measure, Buy, and Prepare: Exact Checklist and Tools
- Step-by-Step Replacement: Install a Face-Mounted Sweep (DIY Sequence)
- Replacing Without Removing the Door and Special Cases
- Troubleshooting and Maintenance After Replacement
- When to Hire a Pro and What a Pro Will Check
- A Few Things Worth Knowing Before You Start
- Get a Free Estimate From Star-ws for the Jobs a Sweep Can’t Fix
- Sources
- FAQ
Types of Door Sweeps and When to Use Each
Walk up to any exterior door and you’ll find one of five sweep styles doing the work, or failing to.
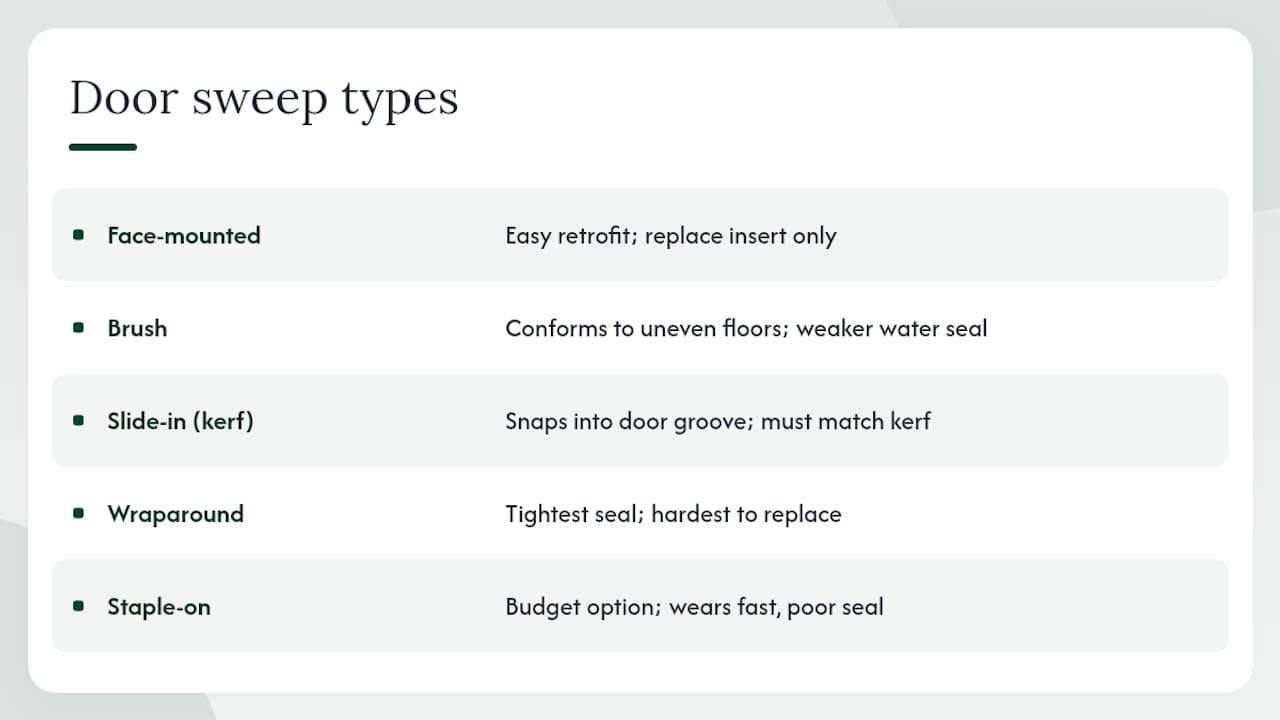
Face-mounted aluminum with vinyl insert is the most common retrofit option. A metal rail screws directly to the face of the door, holding a rubber or vinyl blade that drags along the threshold. It’s easy to install and easy to replace since the insert alone can often be swapped without touching the screws.
Brush or bristle sweeps use dense nylon filaments instead of a rubber blade. They flex over warped or uneven flooring far better than rigid vinyl, which makes them the right call for older doors that have settled or thresholds with slight humps. The tradeoff is a slightly weaker seal against water.
Slide-in or kerf-mount sweeps ride inside a groove cut into the bottom of the door itself. No screws are visible because the rail snaps or slides into that channel, but you must match the kerf profile exactly or the new piece won’t seat.
Wraparound (U-shaped or L-shaped) sweeps cover both the bottom edge and part of the door face, often gripping into a kerf on one or both sides. These give the tightest seal but are the hardest to replace without full access to the door.
Staple-on sweeps are the budget option, usually felt or vinyl strips tacked to the bottom edge. They wear out fast and rarely seal well against pests.
Automatic drop seals lower a rubber gasket when the door closes and lift it on opening, sealing gaps up to about half an inch while staying invisible when the door swings.
For picking between brush and vinyl on a case-by-case basis, this old house’s draft guide notes that brush styles conform better to uneven floors while vinyl and rubber blades seal tighter on flush, level thresholds.
How to Choose a Replacement: Mounting Style, Gap Height, and Door Material
Buying the wrong sweep is the single most common mistake homeowners make, and it usually comes down to skipping one of four checks.
- Match the mounting style exactly. A face-mounted sweep uses screws through the door face; a kerf sweep slides into a pre-cut groove; a wraparound needs access to both the face and the edge. These are not interchangeable.
- Measure the gap height at three points along the threshold (left, center, right), since doors rarely sit perfectly level. Pick a sweep rated for the largest gap you find, or go with brush if the gap varies significantly across the width.
- Factor in pest pressure. Rubber or vinyl blades that touch down fully resist rodents and insects better than brush styles, which have small gaps between bristles.
- Match the fastener to the door material. Wood doors take a standard pilot hole and wood screw. Steel and fiberglass doors often need self-tapping screws or a different bit entirely to avoid stripping the hole.
Watch for manufacturer-specific wraparound profiles, especially on doors from major builders. PNNL’s Building America Solution Center points out that getting the mounting style, door thickness, and gap height right up front is what separates a clean replacement from a return trip to the hardware store, and recommends a professional for the more complex door bottoms.
Measure, Buy, and Prepare: Exact Checklist and Tools
Get your measurements right before you shop, and the install itself becomes routine.
- Measure door width jamb to jamb, then measure the gap between the door bottom and the threshold at both corners and the center.
- Photograph the existing sweep and its mounting hardware before removing anything. This single step saves the most return trips to the store.
- Gather your tools: tape measure, pencil, hacksaw or metal file, drill with bits sized for your fasteners, screwdriver or driver bits, safety glasses, and a few spare screws.
- If you’re installing a staple-on model, keep silicone caulk on hand in case the manufacturer instructions call for a sealed edge.
Standard sweeps come in 36 inch lengths for most residential doors, meant to be trimmed down. Leave about an eighth to a quarter inch of clearance on each side of the cut for expansion, and always read the packaging for which side mounts to the interior versus exterior face; getting that backward means drilling a second set of holes.
Step-by-Step Replacement: Install a Face-Mounted Sweep (DIY Sequence)
This is the sequence most homeowners will actually use, and it applies to the majority of exterior doors built in the last few decades.
- Remove the old sweep. Back out the screws and pull the rail free. Check the door bottom and threshold underneath for rot, soft wood, or rust. If you find damage, stop here. A new sweep on a compromised door bottom won’t hold.
- Mark and cut the new sweep to length. Measure against the actual door width, not the packaging length, and cut with a hacksaw or metal file. File the cut edge smooth so it doesn’t catch on the jamb.
- Pre-drill pilot holes. For wood doors, a small bit prevents splitting. For steel or fiberglass doors, check whether the sweep comes with self-tapping screws designed to bite without a pilot hole at all.
- Fasten starting at the center, working outward, and leave the screws slightly loose at first.
- Test with a sheet of paper. Close the door and try sliding a piece of paper under the sweep at several points along its length. If it slides through easily somewhere, the sweep isn’t making contact there. If it won’t budge at all, the sweep is dragging too hard.
- Tighten the screws fully once the fit feels even, then open and close the door a few times to confirm it still latches without dragging.
If the door won’t latch anymore or the sweep drags against the threshold, loosen the screws and shift the rail up slightly, or trim a hair off the insert with a utility knife. A drag that only shows up on one side usually points to a hinge that’s sagged rather than a sweep that’s misaligned, which is worth checking before you keep adjusting the sweep itself.
Don’t overtighten the screws. Vinyl and rubber inserts compress permanently if you crank them down, and you’ll be shopping for a replacement insert again within a year. Keep the door’s finish protected by using a scrap of cardboard under your drill when you’re working close to painted or stained surfaces, and hang on to any leftover insert material. Most manufacturers sell the vinyl or rubber blade separately from the aluminum rail, so a cracked insert down the road doesn’t mean buying the whole assembly again.
Replacing Without Removing the Door and Special Cases
Face-mounted sweeps and most slide-in inserts can be swapped with the door still hanging on its hinges. This is genuinely the majority of jobs, and it’s confirmed as standard practice by The Spruce’s door sweep guide, which notes that face-mounted and many insert models allow in-place replacement while wraparound types often demand full door removal.
- Insert-only swaps are the fastest fix of all: pull the worn vinyl or rubber strip out of its aluminum channel and slide a new one in. No screws, no drilling, often under ten minutes.
- Wraparound and some kerf-fit sweeps need the door off the hinges to access the channel or the fasteners hidden along the edge.
- Keep manufacturer part numbers whenever you can find them stamped on the old sweep. It’s the fastest way to guarantee a matching kerf profile on reorder.
Pro Tip: Take the photo before you remove anything, and don’t toss the old sweep until the new one is confirmed to fit. A mismatched kerf profile is the single most common return at any hardware store’s door hardware aisle.
Troubleshooting and Maintenance After Replacement
A new sweep should stop drafts immediately. If it doesn’t, the fix is usually quick.
- Dragging or scraping noise: loosen the screws slightly and re-test with the paper method, or trim a sliver off the insert.
- Corner leaks with everything else sealed: the sweep may be riding a hair too high at the corners where the threshold curves; shift the rail down slightly on that side.
- Cracking or hardening insert: vinyl degrades with UV and temperature swings over a few years. Replace just the insert rather than the whole rail.
- Dirt buildup on the threshold causing uneven contact: clean the threshold surface before assuming the sweep itself is at fault.
If the door still won’t seal evenly after these fixes, the problem often lives in the threshold or hinges, not the sweep. A warped threshold or a sagging hinge will defeat even a brand new, correctly installed sweep every time.
When to Hire a Pro and What a Pro Will Check
Call a professional when you spot rot along the door bottom, water intrusion that keeps coming back after a new sweep, a manufacturer-specific wraparound profile you can’t source, or a job that clearly requires pulling the door off its hinges to rehang correctly.
A professional visit typically checks:
- Door bottom integrity and any hidden moisture damage inside the panel
- Threshold alignment and whether it’s level across the full width
- Hinge condition, since a sagging hinge undermines any sweep
- Correct OEM parts and sealing details for the specific door brand
Star-ws handles these more involved cases regularly across the Kansas City area, including door bottom repairs and hardware replacement where a simple retail sweep won’t solve the underlying issue.
A Few Things Worth Knowing Before You Start
Photograph the old sweep before you touch it, tilt a surface-mounted rail slightly toward the exterior so water drains away from the threshold instead of pooling against it, and always test with the paper trick before you fully tighten anything. Keep a spare insert on hand once you know your profile. If you spot soft wood, rust, or a door that won’t sit square anymore, stop and call a pro rather than forcing a new sweep onto a damaged frame.
— Artem
Get a Free Estimate From Star-ws for the Jobs a Sweep Can’t Fix
If you’ve worked through this guide and found rot in the door bottom, a threshold that won’t sit level, or a wraparound sweep locked to a manufacturer part you can’t track down, that’s the point where Star-ws earns its keep. Star-ws handles door replacement and hardware work across the Kansas City area, including door bottom repairs, threshold correction, and full door replacement when a sweep alone won’t solve the draft.

Every estimate is free, and financing is available for larger repairs like frame or rot work that go beyond a typical hardware fix. If your door needs more than a new sweep, request a free estimate and get a straight answer on whether it’s a repair or a replacement before you spend another weekend on it.
Sources
- Stop drafts at the door
- Install or replace door sweeps (PNNL BASC DIY guides)
- Replace or install a door sweep without removing door (The Spruce)
- What is a door sweep? (Angi)
FAQ
Can you replace a door sweep without removing the door?
Yes, in most cases. Face-mounted and many slide-in insert sweeps can be swapped while the door stays on its hinges, though wraparound styles often require removing the door to access the fasteners.
How much does it cost to replace a door sweep?
DIY materials typically run $10 to $60, depending on the sweep type. Professional service costs more when the job involves door removal, rot repair, or sourcing OEM parts, and current pricing details are available from the service provider upon request.
What is the best replacement for an exterior door sweep?
It depends on your threshold. Brush sweeps handle uneven or warped flooring better, while vinyl or rubber blade sweeps seal tighter against drafts and pests on a flush, level threshold.
What’s the difference between a door sweep and a door seal?
A door sweep mounts to the bottom of the door and drags along the threshold to block gaps underneath. A door seal, sometimes called weatherstripping, typically runs along the sides and top of the frame to close gaps around the rest of the door.