
Measuring windows for replacement means recording the interior frame dimensions of your existing window opening so a new unit fits without gaps, air leaks, or costly reorders. Getting those numbers right is the single most important step in any window replacement project. Measurement errors of even a few millimeters can cause air leaks and poor thermal performance. That means a wrong number on your notepad translates directly to higher energy bills and a second trip to the supplier.
What tools do you need before measuring windows for replacement?
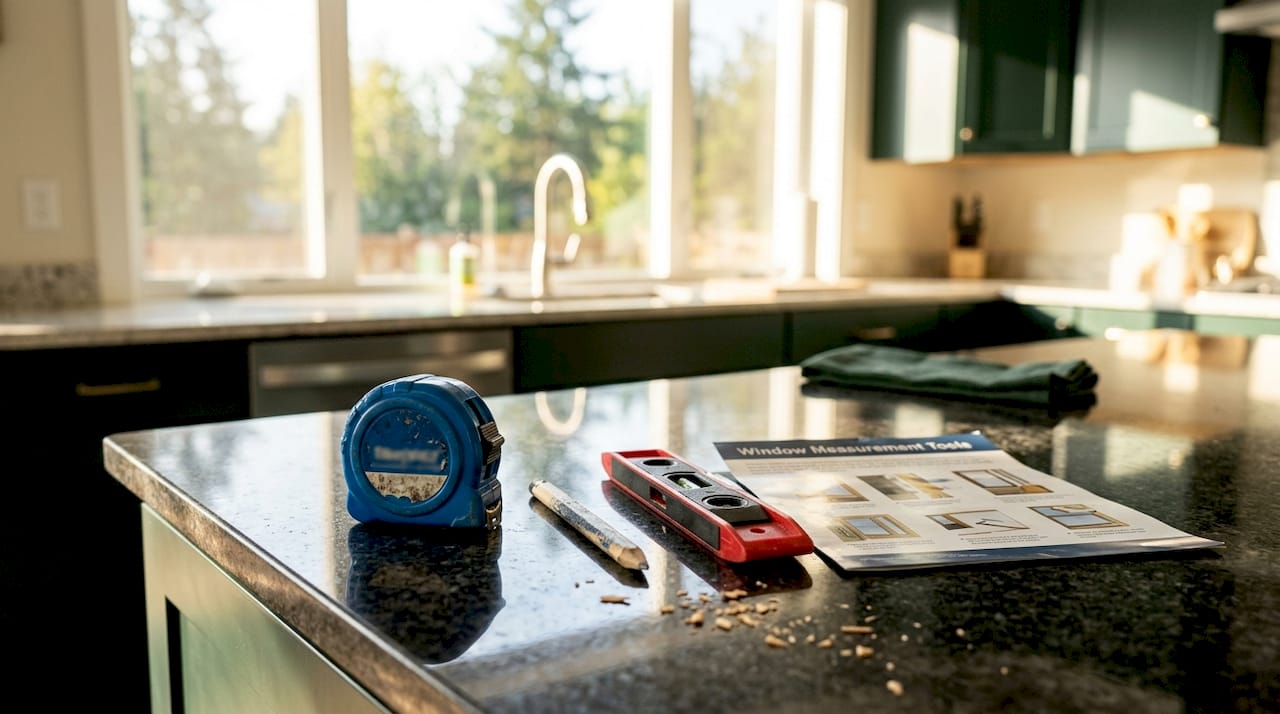
The right tools make the difference between a measurement you can trust and one you have to redo. Gather these before you touch the window:
- Steel tape measure (at least 25 feet): Steel holds its shape better than cloth, which can stretch and give false readings.
- Pencil and notepad: Write every number down immediately. Memory is unreliable when you are juggling three measurements per dimension.
- Flashlight: Full-frame installations expose dark rough openings once the old frame is removed. A flashlight lets you read the studs and header clearly.
- Level or speed square: Checks whether the sill is flat and the jambs are plumb before you commit to a measurement.
- Helper: Large windows need two people. One person holds the tape at the far end while the other reads the number.
Preparation matters as much as the tools themselves. Remove any screens, interior blinds, or window treatments that could block your tape measure. Clean dust and debris from the sill and jambs so the tape sits flat. Measurements must come from interior jambs, not from exterior trim or casing. Measuring from the outside gives you the wrong dimension and risks damaging trim you want to keep.
Pro Tip: Label each window on your notepad before you start. Use a simple code like “LR-1” for living room window one. Mixing up measurements from different openings is one of the most common and expensive mistakes homeowners make.
How to measure width, height, and depth correctly
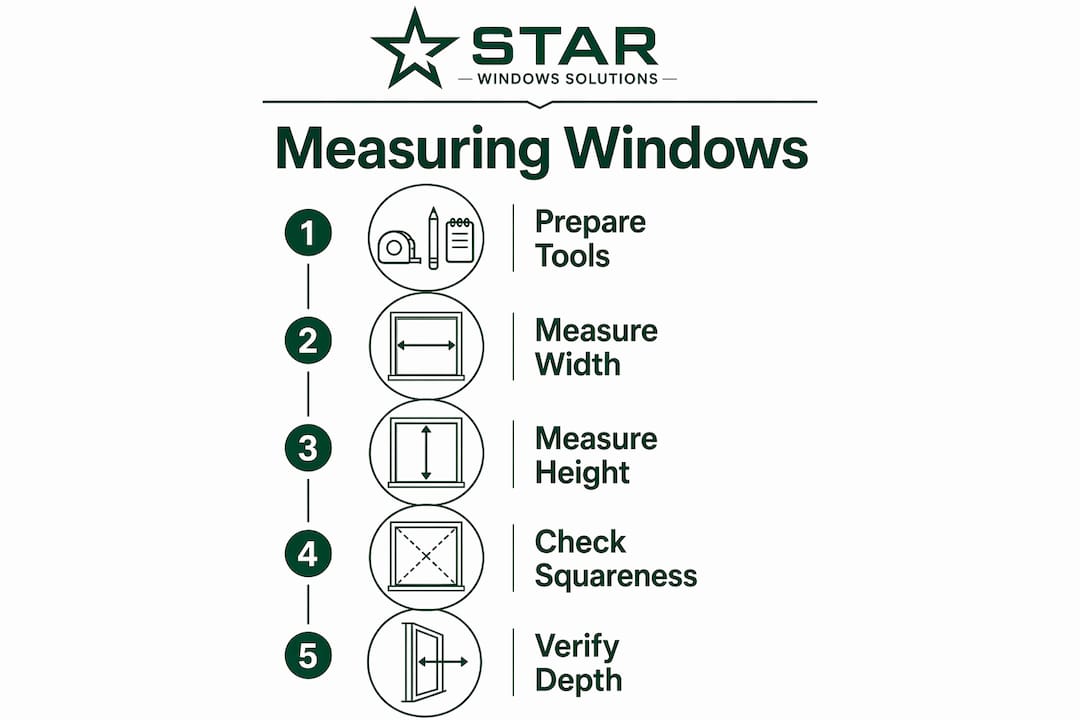
Window replacement measurement follows a three-point rule for every dimension. Taking one measurement and calling it done is how gaps happen.
Measuring width
- Place your tape measure at the left interior jamb.
- Pull it straight across to the right interior jamb at the top of the opening.
- Record that number.
- Repeat at the middle of the opening.
- Repeat at the bottom of the opening, just above the sill.
- Use the smallest of the three numbers when ordering.
Measuring width and height in three places and using the smallest measurement accounts for irregularities in older frames. Walls settle over decades, and no opening is perfectly uniform. Using the smallest number means the new window fits at the tightest point instead of binding against the frame.
Measuring height
- Place your tape at the sill (the flat horizontal surface at the bottom).
- Pull it straight up to the head jamb (the horizontal piece at the top of the frame).
- Record the measurement on the left side of the opening.
- Repeat at the center.
- Repeat on the right side.
- Again, use the smallest of the three numbers.
Pro Tip: Do not measure from the window stool (the interior trim piece that extends into the room). Measure from the actual sill surface inside the frame. Confusing these two surfaces adds unwanted inches to your height measurement.
Measuring depth
Depth is the front-to-back measurement of the frame, from the interior stop to the exterior blind stop. When measuring depth, ignore pulleys or parting strips since these are removed during replacement. The opening needs at least 3¼ inches of depth for most standard replacement windows to fit properly. If your depth is less than that, you may need a custom unit or a different installation method.
| Dimension | Measurement points | Use this number |
|---|---|---|
| Width | Top, middle, bottom | Smallest of three |
| Height | Left, center, right | Smallest of three |
| Depth | Interior stop to exterior blind stop | Must be at least 3¼ inches |
How do you check if a window opening is square?
A square opening means the corners form true 90-degree angles. Most older homes have openings that are slightly out of square due to settling, and that affects how a new window sits in the frame.
Check squareness by measuring diagonally:
- Measure from the top-left corner of the opening to the bottom-right corner.
- Measure from the top-right corner to the bottom-left corner.
- Write both numbers down and compare them.
Standard replacement windows allow a variance of up to ¼ inch in squareness. If your two diagonal measurements differ by ¼ inch or less, the opening is within acceptable range and a standard window will install cleanly. A difference greater than ¼ inch signals a problem that needs attention before you order anything.
Out-of-square openings are not a dead end. They do require shimming during installation to bring the window into alignment, and in severe cases they point to structural issues worth assessing before proceeding. If your diagonals differ by more than ½ inch, contact your installer or supplier before placing an order. Ordering a window for a badly out-of-square opening without a plan leads to gaps, drafts, and failed seals.
Common mistakes that throw off window measurements
The most frequent error homeowners make is measuring the old window frame instead of the structural opening. Never measure the old window frame itself since it may be warped or poorly fitted. Old frames shrink, swell, and warp over time. The number you get from a warped frame is the wrong number. Measure the actual opening, jamb to jamb and sill to head jamb.
A few other mistakes show up repeatedly:
- Measuring only once: One measurement per dimension is not enough. Openings are rarely uniform. Always take three readings.
- Letting the tape sag: A tape measure held straight and taut gives accurate readings. A sagging tape adds false length. For windows wider than 4 feet, use a helper.
- Rounding numbers: Write the exact measurement, including fractions. “36 inches” and “35¾ inches” are not the same window.
- Forgetting to record units: Write “inches” next to every number. Suppliers work in inches, and mixing up feet and inches causes real ordering errors.
- Skipping the depth check: Homeowners often measure only width and height. Skipping depth means you may order a window that physically cannot fit in the frame pocket.
“Measure twice, cut once” applies directly to window replacement. The cost of a reorder, including shipping and installation delays, far exceeds the five minutes it takes to double-check your numbers.
Pro Tip: Take a photo of each window opening after measuring. Write the measurements on a piece of paper and hold it in the frame while you photograph it. You will have a visual record that matches your notes, which is useful when talking to suppliers.
Organizing your measurements clearly before contacting a supplier saves time and prevents miscommunication. Use a simple table or grid in your notepad with columns for window location, width, height, depth, and diagonal difference. Suppliers use these numbers to recommend the correct unit size, so clear records speed up the ordering process.
Pocket installation vs. full-frame installation: how measurement differs
The type of replacement you plan changes what you measure and how you use those numbers.
| Factor | Pocket (insert) installation | Full-frame installation |
|---|---|---|
| What you measure | Interior jamb dimensions | Rough opening (stud to stud) |
| Frame condition | Existing frame stays in place | Existing frame is fully removed |
| Measurement reference | Interior jamb to jamb | Stud face to stud face |
| Depth requirement | At least 3¼ inches in existing frame | Measured after frame removal |
| When to use | Frame is in good condition | Frame is rotted, damaged, or wrong size |
Pocket installation, also called insert replacement, drops a new window unit into the existing frame. You measure the interior of that frame, jamb to jamb and sill to head jamb. The new unit is sized slightly smaller than those measurements to allow for shimming and sealing.
Full-frame installation removes everything down to the rough opening, including the frame, sill, and trim. You measure the rough opening from stud to stud and from the rough sill to the header. Rough opening measurements are larger than the unit ordered, and suppliers use those numbers to recommend the correct unit size. If your existing frame shows signs of rot or moisture damage, full-frame replacement is the right call, and your measurement approach changes accordingly.
Key takeaways
Accurate window replacement measurement requires three readings per dimension, squareness verification, and using the smallest measurement when ordering.
| Point | Details |
|---|---|
| Measure from interior jambs | Always measure jamb to jamb and sill to head jamb, never from exterior trim. |
| Use the three-point method | Take width and height at three positions each; order using the smallest number. |
| Check squareness | Diagonal measurements must differ by no more than ¼ inch for a standard fit. |
| Know your installation type | Pocket installs measure the existing frame; full-frame installs measure the rough opening. |
| Verify depth | Confirm at least 3¼ inches of depth before ordering any replacement unit. |
What I have learned from years of window measurement errors
Homeowners consistently underestimate how much a single wrong number costs. I have seen projects delayed by weeks because a width measurement was taken from the exterior casing instead of the interior jamb. The window arrives, it does not fit, and now you are waiting on a custom reorder while your opening is covered with plastic sheeting.
The squareness check is the step most DIYers skip entirely. They measure width and height, feel confident, and place the order. Then the installer arrives and finds a ½-inch diagonal difference that requires shimming on three sides. That adds labor time and, in some cases, means the window does not seal properly even after installation.
My honest recommendation: do your own measurements as a planning exercise. Walk through every step in this guide, record your numbers carefully, and use them to have an informed conversation with your installer. But let a professional take the final measurements before you place the order. Professional installers assume liability for their measurements. If the window does not fit based on their numbers, the problem is theirs to solve. That liability shift is worth more than the cost of a measurement visit.
The DIY measurement process teaches you the language of window replacement. You will know what your installer is talking about when they mention jamb depth or diagonal variance. That knowledge makes you a better client and helps you catch errors before they become expensive.
— Artem
Window replacement services in Kansas City
Getting your measurements right is the foundation of a successful replacement. Star-ws takes that foundation seriously, offering professional measurement visits alongside full window replacement services in Kansas City for both residential and commercial properties.

Star-ws handles everything from pocket installs in well-maintained frames to full-frame replacements where rot or structural damage has compromised the existing opening. The team takes final measurements on-site, assumes responsibility for fit, and works with energy-efficient units that reduce heating and cooling costs year-round. Free estimates are available, and financing options make quality replacement accessible without a large upfront cost. If you are ready to move from measurements to installation, request a replacement estimate and let the Star-ws team handle the precision work.
FAQ
What is the correct way to measure window width?
Measure from interior jamb to interior jamb at the top, middle, and bottom of the opening. Use the smallest of the three measurements when ordering your replacement window.
How do I know if my window opening is square?
Measure diagonally from corner to corner in both directions. If the two diagonal measurements differ by more than ¼ inch, the opening is out of square and may need shimming or professional assessment.
Should I measure the old window or the frame opening?
Always measure the frame opening, not the old window unit. Old frames can be warped or poorly fitted, and those distorted dimensions will produce an incorrectly sized replacement.
What is the minimum depth needed for a replacement window?
Most standard replacement windows require at least 3¼ inches of depth between the interior stop and the exterior blind stop. Measure this before ordering to confirm compatibility.
Do I need a professional to measure my windows?
Taking your own measurements is a useful first step, but a professional installer should take the final measurements before you place an order. Professional measurements come with liability, which protects you if the window does not fit.