
Repairing window frame rot mid-project means removing all decayed wood, treating the remaining fibers with a consolidant, filling the cavity with structural epoxy or grafted wood, and sealing the repair against future moisture. Discovering rot during a window renovation is common, and it does not have to stop your project. The key is knowing how deep the damage runs, which materials to use, and in what order to apply them. This guide covers the full process, from the screwdriver test through final paint, so you can finish the job right.
How to repair window frame rot mid-project: assessing the damage first
The screwdriver test is the standard method for checking wood firmness during a window renovation. Press the tip of a flathead screwdriver into the wood with light hand pressure. If it sinks in without resistance, the wood fibers have broken down and rot is active. Solid wood resists the tip cleanly.
Repair is generally feasible when rot affects less than 10–30% of the frame or sill. Beyond that threshold, full component replacement becomes the more reliable choice. That range matters because it gives you a clear decision point before you spend time and money on a repair that will not hold.
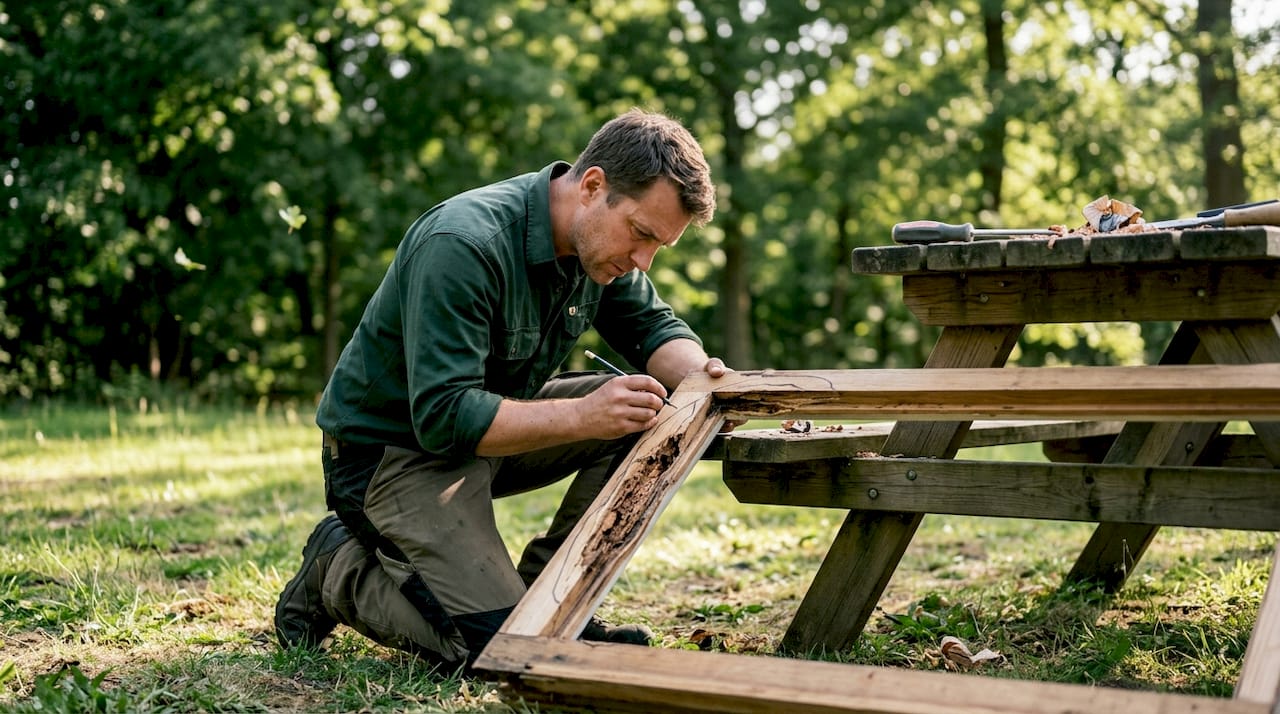
One thing most homeowners miss: rot extends 3–5 times beyond what you can see on the surface. What looks like a two-inch soft spot may have traveled six to ten inches into the frame. Check the structural studs and sill plates behind the frame, not just the trim.
| Damage level | Visible rot area | Recommended action |
|---|---|---|
| Minor | Less than 10% of component | Epoxy fill repair |
| Moderate | 10–30% of component | Dutchman patch or epoxy |
| Severe | Over 30% of component | Full component replacement |
| Structural | Studs or sill plates affected | Permit may be required |
Pro Tip: Mark the full rot boundary with a pencil before you cut anything. Probe every inch around the soft spot so you know the true repair zone before committing to a method.
Cost is a real factor in mid-project window repairs. Minor trim rot adds $200–$500 to a project, while structural repairs can run $1,000–$3,000 or more. Sourcing pressure-treated lumber and proper flashing can add several days to your timeline. Build that buffer into your schedule before you start cutting.
What tools and materials do you need for window frame rot repair?
The right materials make the difference between a repair that lasts a decade and one that fails in the first winter. Two-part exterior-grade epoxy filler is the correct choice for structural rot. Standard wood putty and filler are not rated for exterior structural use and fail quickly when exposed to moisture cycles. Wrong filler choice is the leading cause of repair failure within the first year.
Tools you need:
- Wood chisels in 1/2-inch and 1-inch widths for controlled excavation
- Rotary grinding tool or oscillating multi-tool for removing soft wood in tight corners
- Stiff wire brush to clean exposed wood surfaces
- Putty knife and margin trowel for applying and shaping epoxy
- Orbital sander and 80-grit, 120-grit, and 220-grit sandpaper for finishing
Materials you need:
- Borax or sodium borate powder mixed with water as a fungicide treatment
- Penetrating wood consolidant or stabilizer to harden remaining soft fibers
- Two-part exterior-grade epoxy filler for structural cavity fills
- Kiln-dried lumber, waterproof glue, and stainless steel fasteners for Dutchman repairs
- Exterior primer and paint rated for wood surfaces
- Safety glasses, gloves, and an N95 respirator for dust and chemical exposure
Epoxy systems bond chemically to wood, are waterproof, and are designed for structural use. They shrink minimally and form a durable seal that conventional putties cannot match. That chemical bond is what makes them worth the higher cost.
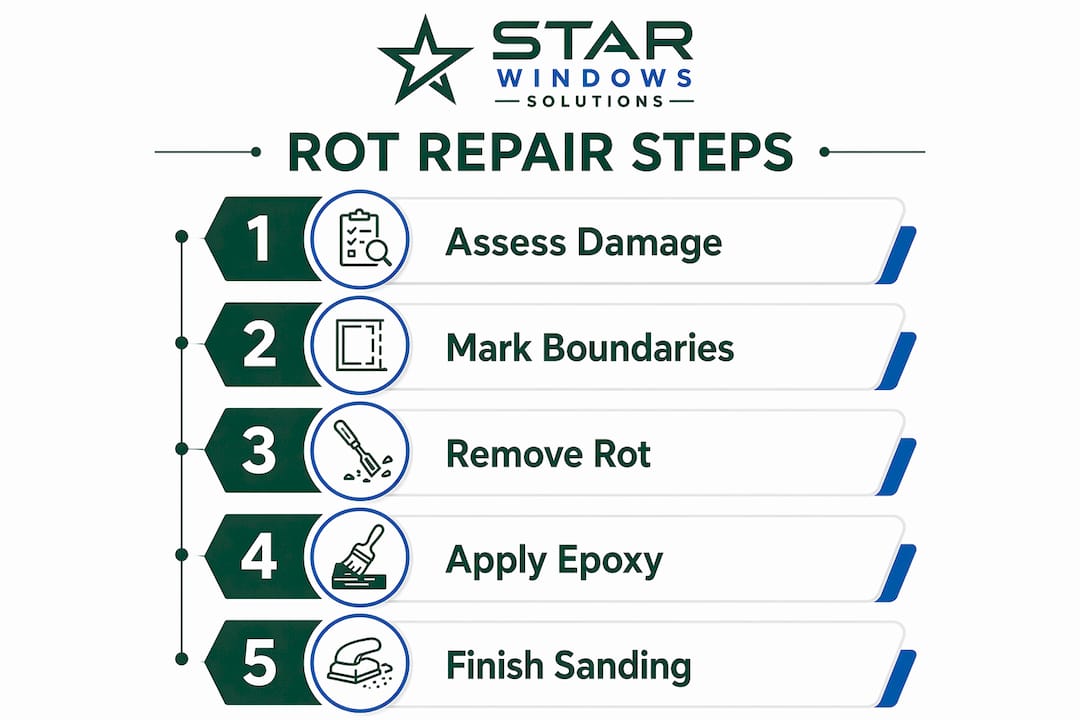
Step-by-step process for fixing rot in a window frame
Follow these steps in order. Skipping any stage, especially the fungicide and consolidant steps, creates a moisture trap that accelerates rot progression under the new filler.
-
Stop work and assess fully. Do not install the new window over unknown rot. Probe the entire frame perimeter with a screwdriver before proceeding.
-
Excavate all decayed wood. Use a chisel and rotary tool to remove every soft, pulpy, or discolored section. Keep cutting until the wood resists the screwdriver tip cleanly on all sides.
-
Apply borax fungicide. Treating with borax or sodium borate kills active spores before you seal the cavity. Mix according to label directions and brush it generously onto all exposed wood surfaces. Let it dry completely, typically 24 hours.
-
Apply wood consolidant. Brush penetrating consolidant onto all remaining wood in the repair zone. It soaks into weakened fibers and hardens them into a stable substrate. Allow full cure time per the product label before filling.
-
Fill with two-part epoxy. Mix the epoxy components thoroughly and pack the cavity in layers. Shape it slightly proud of the surface so you have material to sand flush. Work in temperatures above 50°F for reliable curing.
-
Perform a Dutchman repair for large damage. Dutchman repairs involve cutting out the damaged section and grafting in kiln-dried new wood with waterproof glue and stainless steel fasteners. This method is preferred when damage covers more than 15–20% of the component, and it provides better structural integrity than a large epoxy fill alone.
-
Sand smooth and flush. Once the epoxy or new wood has fully cured, sand the repair flush with the surrounding frame. Work through 80-grit, then 120-grit, then 220-grit for a surface ready to paint.
-
Prime and paint completely. Proper flashing and weatherproofing during finishing prevent future moisture intrusion. Apply two coats of exterior primer, then two coats of exterior paint. Caulk all joints where the frame meets the wall or sill.
Pro Tip: Warm the epoxy components to room temperature before mixing in cold weather. Cold epoxy cures slowly and can remain tacky, which traps debris and weakens the bond.
The window sill rot repair process follows the same sequence, but pay extra attention to the underside of the sill where water pools and paint fails first.
Common mistakes when dealing with frame rot mid-project
Most repair failures trace back to a small set of avoidable errors. Knowing them in advance saves you from redoing the work.
-
Using standard wood filler. Interior-grade putties absorb moisture, swell, and crack. Use only two-part exterior epoxy or a Dutchman patch for any structural rot repair.
-
Incomplete excavation. Leaving soft wood under the filler creates an internal moisture trap. Surface-level repairs without full excavation accelerate rot progression rather than stopping it.
-
Skipping the consolidant. Epoxy needs a firm substrate to bond to. Applying filler directly over weakened fibers leads to delamination within one to two seasons.
-
Overheating epoxy during curing. Heat guns can speed curing, but overheating leads to bubbles and bond failure. Keep the gun moving and stay at least six inches from the surface.
-
Ignoring structural framing. If rot has reached the studs or sill plates, you may need a building permit before proceeding. Check with your local building department. Skipping permits on structural work creates liability and resale problems.
Rot found mid-project almost always extends further than the first inspection suggests. The homeowners who get lasting results are the ones who excavate aggressively, treat every exposed surface with fungicide, and finish with a full paint system. Cutting any of those steps short is the reason most DIY rot repairs fail within two years.
Pro Tip: Buy 20% more epoxy than you think you need. Rot cavities are almost always larger than they look, and running out mid-fill forces a cold joint that weakens the repair.
Rot is caused by moisture penetration through failed caulking, flashing, or inadequate ventilation. After the repair, address the moisture source directly. Modern materials like vinyl and fiberglass eliminate rot concerns entirely if you decide to upgrade the frame rather than repair it.
Key Takeaways
Repairing window frame rot mid-project requires full excavation, fungicide treatment, structural epoxy or Dutchman patching, and a complete exterior paint system to produce a lasting result.
| Point | Details |
|---|---|
| Assess before cutting | Use the screwdriver test and probe beyond visible rot to find the true damage boundary. |
| Repair vs. replace threshold | Rot covering less than 10–30% of a component is repairable; beyond that, replace the component. |
| Fungicide is non-negotiable | Apply borax or sodium borate to all exposed wood before filling to kill active spores. |
| Use structural epoxy only | Standard wood putty fails outdoors; two-part epoxy or Dutchman repairs are the only durable options. |
| Finish completely | Prime, paint, and caulk every joint to seal the repair and prevent moisture from returning. |
What I’ve learned from mid-project rot discoveries
The repair that surprises most homeowners is not the one they planned for. It is the one hiding behind the trim they just pulled off. After seeing dozens of window projects in the Kansas City area, the pattern is consistent: the visible rot is never the whole story.
The single biggest mistake I see is homeowners stopping excavation too early because the cavity looks “big enough.” Rot travels along grain lines and moisture channels that are invisible until you cut into them. I always tell people to keep probing until the screwdriver bounces off solid wood in every direction, not just the obvious ones.
Structural epoxy gets a bad reputation for being difficult to work with, but that reputation comes from people mixing it in cold garages or applying it over unconsolidated wood. Follow the temperature guidelines, use the consolidant first, and epoxy is actually forgiving material. It sands well, holds paint, and does not shrink the way wood does through seasonal moisture changes.
The finishing step is where most DIY repairs lose their longevity. Two coats of primer and two coats of paint sounds like overkill until you realize that bare epoxy and raw wood joints are the entry points for the next round of rot. Caulk every seam where the frame meets the wall. Check it every spring. That five-minute annual inspection is the difference between a repair that lasts ten years and one that needs redoing in three.
For damage that has reached the structural framing, call a professional before you cut anything else. Shoring a wall mid-project without the right support is a safety issue, not just a carpentry problem. The window frame rot repair work that requires structural intervention is the work where professional assessment pays for itself immediately.
— Artem
When Star-ws can take the project off your hands
Discovering rot mid-project is manageable when the damage stays in the trim. When it reaches the framing, the sill plate, or multiple frame components, the scope changes fast.

Star-ws handles window frame rot repair and replacement for homeowners and property managers across the Kansas City area, including mid-project situations where rot was found after the old window came out. The team assesses damage severity, handles structural repairs where needed, sources the right materials, and finishes the job with proper weatherproofing. Free estimates are available, and financing options make larger repairs accessible. If the rot in your project has gone further than you expected, contact Star-ws for a professional inspection before the opening sits exposed any longer.
FAQ
How do I know if window frame rot is repairable or needs replacement?
Repair is viable when rot covers less than 10–30% of the frame or sill component. If damage exceeds that range or has reached structural framing, full replacement is the more reliable option.
What is the best filler for repairing rotted window frames?
Two-part exterior-grade epoxy filler is the correct choice for structural rot. Standard wood putty fails outdoors and is the leading cause of repair failure within the first year.
Do I need a permit to repair window frame rot mid-project?
You may need a permit if rot has reached structural studs or sill plates. Check with your local building department before cutting into framing, since structural work without permits creates liability and resale issues.
What is a Dutchman repair for window frames?
A Dutchman repair removes the damaged section and grafts in kiln-dried new wood using waterproof glue and stainless steel fasteners. It is the preferred method when damage covers more than 15–20% of the component.
How do I prevent window frame rot from coming back after repair?
Caulk all joints and maintain paint integrity to block moisture entry. Inspect caulking and paint every spring, and address any failed flashing immediately to stop the moisture cycle that causes rot.